We can help.
Here’s what you need to do to change your system over to Rident™ without any hiccups.
Option 1. Do a manual “update”
The simplest way to switch from pfSense® to Rident™ (our optimised version of the pfSense® software), is to use our latest update file to do a manual “upgrade” on your system.
Step 1. Download the update image from our website
Go to the Rident™ section on our software images page.
Select the update that matches your current install and save the update file to your local computer.
Notes
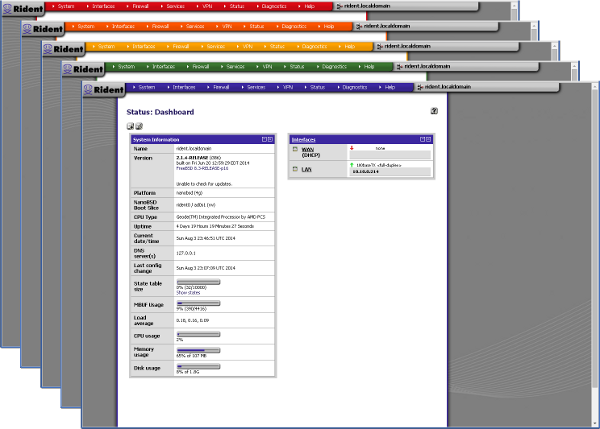
- If you’re not sure on the specs of your current install, visit the dashboard in the WebGUI and check the ‘Platform’ for the platform and size of your current install, and the ‘CPU Type’ for your current architecture.
- You don’t need to change versions when doing this changeover e.g. you can successfully “update” from pfSense 2.1.5 to Rident 2.1.5 (or any other version for that matter).
Step 2. Do a manual “update”
Note: Before you change anything, we strongly recommend that you backup your configuration using Diagnostics > Backup/restore.
Using the WebGUI on your current install, go to System > Firmware and choose ‘Manual Update’.
Click ‘Choose File’ and browse to the update file that you just downloaded from our website.
Click ‘Upgrade firmware’ to start the upgrade process.
Ignore the warning message that you get once the file has uploaded:
The digital signature on this image is invalid.

This means that the image you uploaded is not an official/supported image and may lead to unexpected behavior or security compromises. Only install images that come from sources that you trust, and make sure that the image has not been tampered with.

Do you want to install this image anyway (on your own risk)?
and click “Yes” to proceed.
Note: This message is correct. The digital signatures will not match, because you are changing between two different systems – pfSense® which is signed by the pfSense® project and Rident™ which is signed by Yawarra – but provided that you have downloaded your update file directly from our website, then it is safe to proceed.
Wait for the upgrade to upload and install and for your system to reboot (around 10-20 minutes, depending on your hardware and network speeds).
Step 3. (Optional) Copy your changes across to the other slice
The Rident™ system is set up to use two slices, entirely for the purposes of upgrades.
So at this point, one of your slices is using Rident™ (the current slice) and the other slice still has pfSense® on it.
You can just leave it this way, because the next time you update Rident™ the other slice will be overwritten as part of the update.
But if you want to, you can copy your changes across now to the second slice using the ‘Duplicate bootup slice to alternate’ under Diagnostics > NanoBSD
Important
There is one thing that will not change over using this method, and that is the Master Boot Record.
This is used to display the slice names on bootup, so these will still say ‘pfSense’.
If you want to change these to say ‘Rident’, you will need to:
- Copy the image off your storage device onto your local machine
- Edit the file with your favourite binary file editor e.g. EditPad
- Replace these bytes
70 66 53 65 6E 73 E5with these bytes52 69 64 65 6E F4 90 - Copy the edited image back onto your storage device
Notes
- The string only occurs once in the Master Boot Record, at location 01A2.
- The Master Boot Record is the first 512 bytes of the image, so don’t touch anything past this point.
But it’s entirely up to you whether or not you want to go to the effort for this extra step.
Option 2. Do a clean install
Although this may seem like the neater option, it may end up being more complicated because you have to remove the storage device from your box to do it, meaning that your firewall/router will be offline for a lot longer.
Step 1. Backup your system configuration
Go to Diagnostics > Backup/restore in the WebGUI, and backup your configuration and save the backup file to your local computer.
Shut down your box, remove the storage media from the box and mount it on your local computer.
Step 2. Copy a full install of Rident onto your storage media
For instructions on how to install Rident™ check out our tutorials on:
The steps for installing Rident™ are at the bottom of each of these pages.
Even if you’re not using the exact same boards, you should be able to use these tutorials to get the job done for your particular hardware.
Once you’ve copied the Rident™ full install onto your storage media, reinstall it back into your box, and boot up.
Step 3. Restore your configuration
Go to Diagnostics > Backup/restore in the WebGUI, and restore your configuration using the file you saved earlier to your local computer.
You’re all done!
Now your system should look like our standard Rident™ install, and you’re ready to start using it.
See, now wasn’t that easy?
And if that all seems too hard, you can always buy a compact flash card or SD card from us with our Rident™ image pre-installed, and save yourself the trouble.
And we’d love to hear all about your experience with changing from pfSense® to Rident™ so we can make sure we’re getting it right.
Have an awesome day!
Want more great articles like this?
Sign up for email updates and get them delivered straight to your inbox.
We'll also donate $5 to Voyage Linux, to support the ongoing development of this fantastic software.
Sign me up!


