What is a terminal emulator?
A long time ago, in a computer room far far away, before the days of fibre-to-the-node, or ADSL, or even Gigabit ethernet, there existed a way of connecting computers together called a serial line.
The serial line allowed two devices to talk to each other by sending a bunch of signals in series along a single wire. It worked well, and it still does, actually.
When you wanted to access a computer system that worked this way, you needed a serial terminal – a device on which these serial line communications terminated.
A serial terminal was basically a screen and keyboard that allowed you to get output (the screen) and provide input (the keyboard).
Like this DEC VT100, a serial terminal from way-back-when:
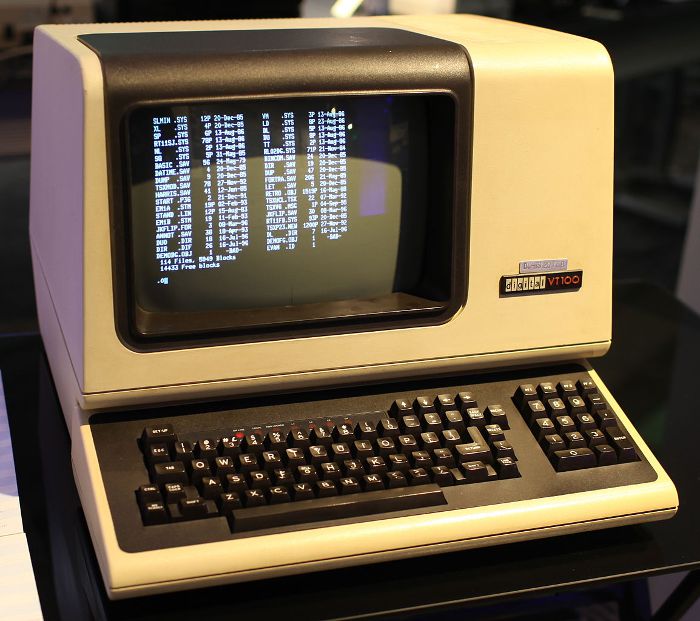
By Jason Scott (Flickr: IMG_9976) [CC BY 2.0], via Wikimedia Commons
But it’s big and heavy, and these days we have more modern computers, right?
So now, instead of a big clunky green screen and keyboard, we use a piece of software that pretends to be a serial terminal by emulating it.
Tada, a terminal emulator.
Why would I want to use one?
When serial terminals were the norm, specific protocols were created to allow systems to communicate over serial lines, and these protocols worked really well.
In fact, they worked so well, that support for them is still built into new systems today, for a variety of reasons:
- It’s a much lower overhead than a Gigabit ethernet port, or wireless connection
- It can be shoved into a very small chip, that doesn’t cost much
- It can be supported directly in BIOS, and
- It’s pretty much universally recognised because the standard is so old
As far as the devices we sell at Yawarra, serial ports are standard on our ALIX, APU and net servers.
So, if you want to connect directly to one of these systems (none of which have keyboards or screens, also called “headless” systems) you have to use the serial port and a desktop computer running terminal emulator software, connected via a special cable called a null modem cable.
The awesome news is that we will give you one of these cables free of charge when you buy one of these systems from us, so you don’t have to go looking for one.
How do I use a terminal emulator?
There are four steps you’ll need to follow to use a terminal emulator with your device.
1. Install terminal emulator software
First you need to install a terminal emulator package.
If you’re using Windows, then it comes with one called hyperterminal. But it’s not very good, and there are many better, free alternatives.
I use one called Teraterm Pro but PuTTY also works well. For this tutorial, I’m going to use Teraterm Pro.
Download your terminal emulator software of choice and install it.
So, now you’ve got your terminal emulator software installed? Excellent.
2. Connect serial port on device to PC
Next, you’ll need to connect the serial port on your device (ALIX, APU, net) to your desktop PC.
If your PC is on the older side, you might be lucky enough to have a serial port on it already, and you can just plug your null modem cable in directly.
But if your PC was built any time recently, chances are it doesn’t actually have a serial port. However, it almost certainly has USB ports.
In that case, you’ll need a USB to serial adapter. Go to Google, type “usb to serial adapter” into it, and buy yourself one.
They’re easy to find and can cost anywhere from about $5 to $90. Mine cost about $15 so you really can’t go wrong, and it will come in very handy.
The good thing about these kinds of inexpensive adapters is that they usually use mass-produced chips, so they’re very likely already supported by your operating system. If not, they’ll come with drivers for Windows.
Once you’ve got yourself a serial port end on your PC, just plug one end of your null modem cable into it, and the other end into the serial port on your device.
So, now you have the terminal emulator software installed, and you’ve physically connected your PC to the serial port on your device using your adapter and cable.
Awesome! Let’s talk settings…
3. Configure your terminal emulator
3.1 Ports
The first thing to know is which port you are connected to.
Typically on Windows it’s COM1 or COM2 (or some higher number if you have a lot of ports). By default, Teraterm only goes as high as COM4.
Note: If you can’t find your port in that range, you can increase the range by editing the Teraterm.ini file in the same directory as you installed it. The setting you need is called “MaxComPort”.
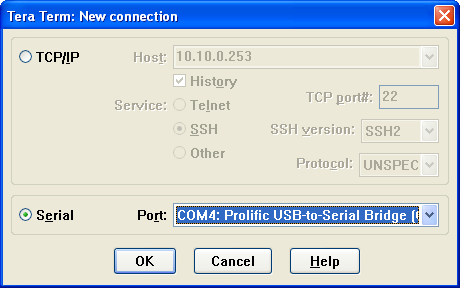
When you start Teraterm, it will give you a choice between telnet (TCP/IP) and serial port.
Select “Serial”.
Then select the COM port you want to use and click “OK”.
3.2 Baud rate
The next important setting to know about for a terminal emulator is the baud rate. This is the send and receive speed, measured in bits/sec.
Both ends (your emulator and your device) have to use the same speed, or you will get a garbled message.
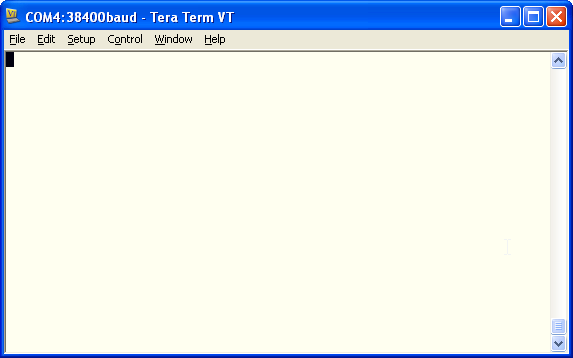
The current baud rate will be displayed in the top bar of the window.
To change your baud rate, select “Setup -> Serial Port” from the menu, and click the drop down box for baud rate.
The correct value will depend on which device you have connected, whether it has software installed, and what exactly that software is.
For example, if you’re using an ALIX board, the default rate is 38400, but if it has pfSense installed, it will be either 9600 (prior to version 2.2) or 115200 (version 2.2 and later).
If you can’t see regular text on the output, then the rate is probably incorrect. Keep trying different rates until you see sensible looking output.
For ALIX and net devices, common rates are 9600, 19200, 38400 and 115200. Other rates are possible but not likely.
Note: Each time you change a setting in the terminal emulator, you’ll need to do something to trigger a response from the device, such as powering it on, or pressing a key on the keyboard, in order to apply your new settings.
3.3 Other settings
You’ll see some other settings in the serial port setup that control the way the communication works, specifically for “Data”, “Parity” and “Stop”. You can safely ignore “Flow control” for our devices.
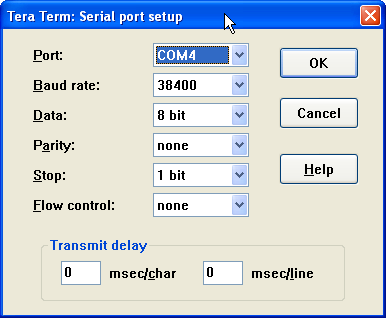
The default settings shown here will work in most cases, but if your device has specific settings, they’ll normally be specified in shorthand in the documentation.
For the example above, it would be written as:
38400,8,N,1
so if your device documentation has something that looks like this, it’s referring to these settings.
You can change settings during a session so it isn’t necessary to restart the connection each time you change something. You just need to apply your changes by triggering a response from the connected device.
If you can’t get a connection to your unit, keep playing with these settings until you see something on the terminal emulator screen that looks sensible.
4. Start using your device
Once you have a connection, you should start to see something like this:
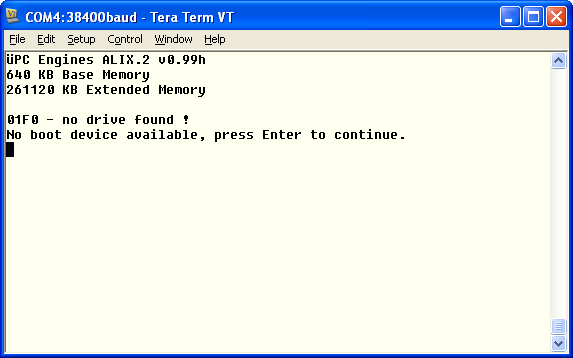
Congratulations, you are now connected to your device via the serial console using a terminal emulator.
Go forth and do cool stuff!
Want more great articles like this?
Sign up for email updates and get them delivered straight to your inbox.
We'll also donate $5 to Voyage Linux, to support the ongoing development of this fantastic software.
Sign me up!


I didn’t know that terminal emulators are not really that hard to set up. I was on wavelink.com/products/terminal-emulation/ and I noticed that they have a download of this emulator. I think it would be nice to download that and try it out just to see if it will work for you.
Hi Vince,
Thanks for the tip.
thanks for a great article. I used to use these terminals but now that I’m old I find that they are too, and are mostly forgotten. I spent all afternoon guessing at how I would configure one of the emulators I found on the net, only to discover (thanks again) there’s one in Windows! So now I’ll have dinner and try again tomorrow, armed with the knowledge you provided me.
Many thanks once again.